Making fake rocks using cement
There are many different ways of making fake rocks. They can be made with plastic, fiberglass or cement mixes. I prefer making my rocks from cement. Cement will be a little heavier than plastic or fiberglass, but they make up for it in looks. Also known as artificial rocks, faux, imitation or man made rocks.
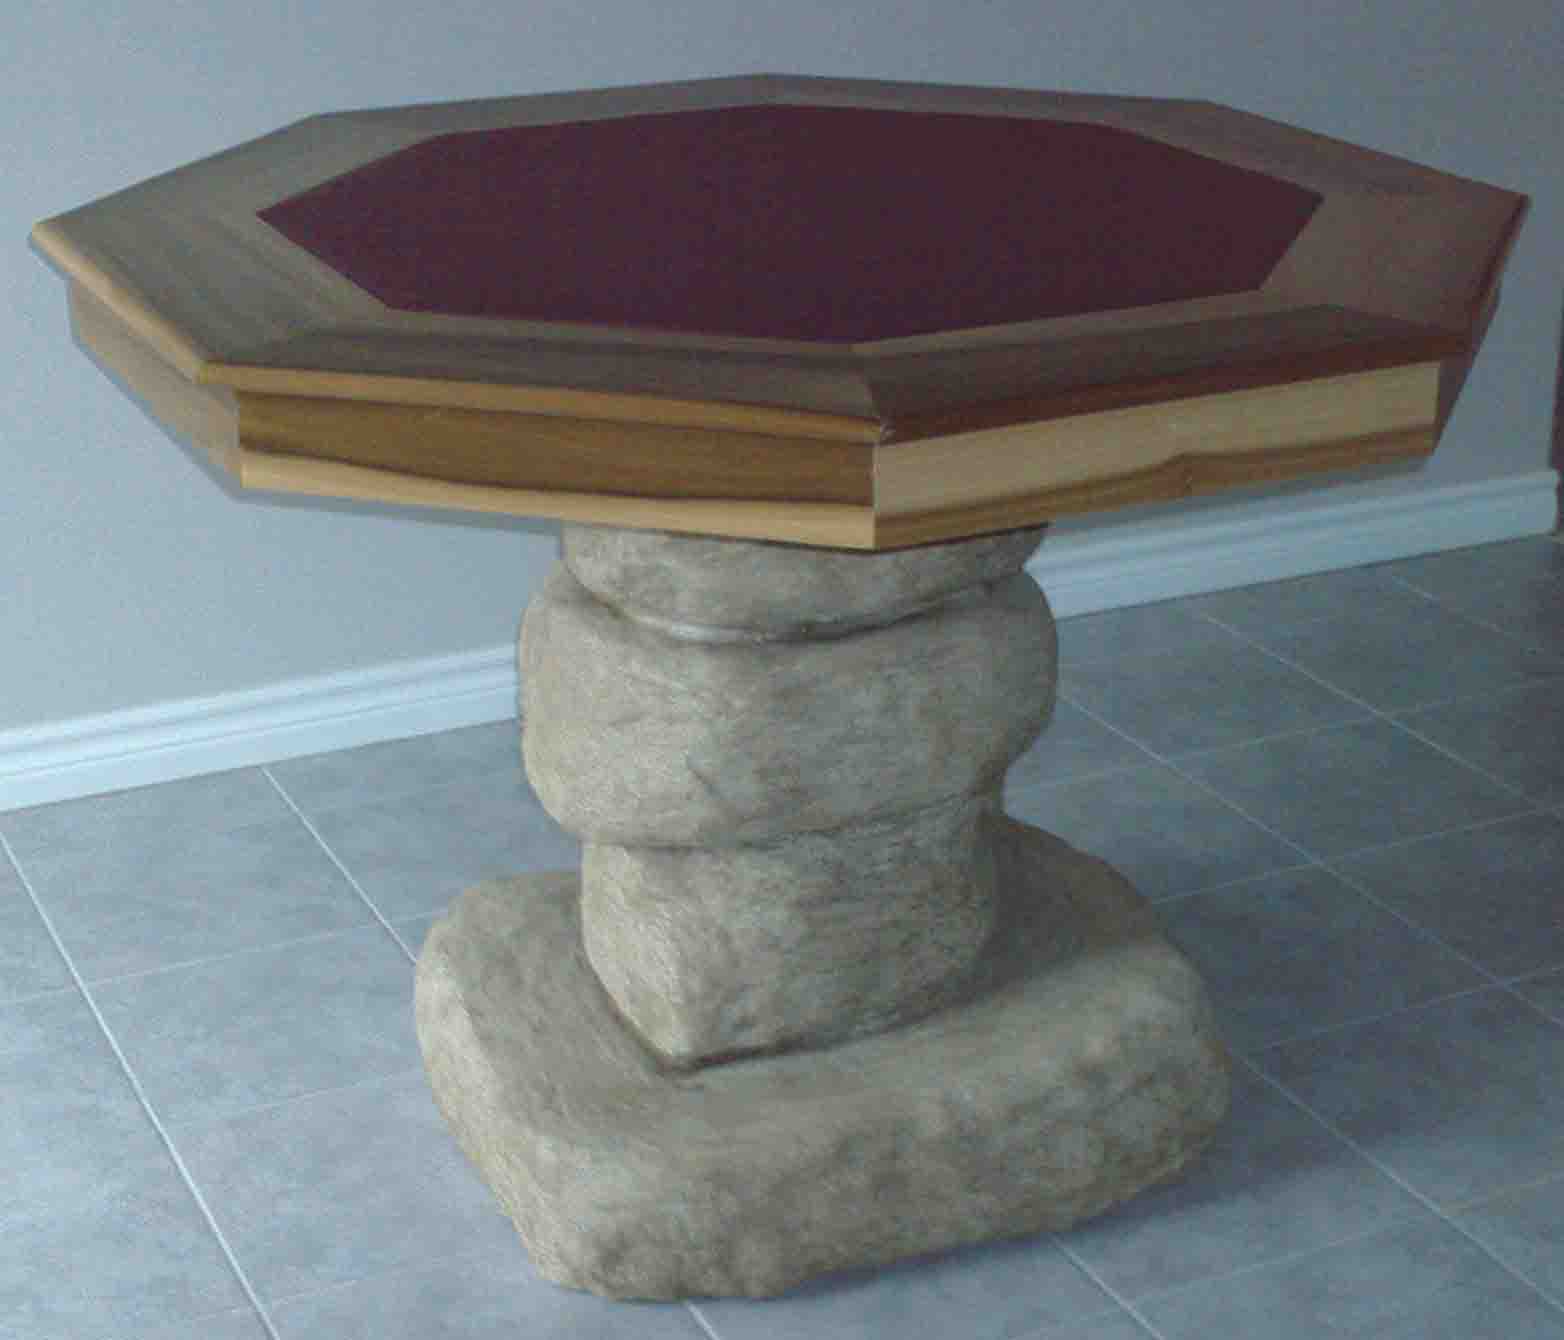
An artificial rock can be made any size or any color. They can be used for covering unsightly features in your yard such as wells and gas meters. Most are made for decorations or for waterfalls. You can have a rock feature that drains into your pool or have a living rock. A living rock simple has a pump underneath that pumps the water to the top. The water then splashes down the rock into a reservoir.
You must first figure out the size, shape and if you want it hollow or not. Another thing you may want to ask yourself is if you want any lights or plumbing for water. There is a few ways you can start your project. I like to use cardboard boxes then wrap it with lath (chicken wire) to mold the basic look of the rock. If the rock is going to need lots of strength, you may want to weld a metal cage or built a wood frame, then fill it with boxes. This is only necessary if you are going to walk on it or it is going to be supporting something. Some people prefer to use big chunks of styrofoam, then shape it. I find solid styrofoam to be expensive and messy.
Once you have the basic form of your rock made, you will need to apply a thick coat of a mixture of styrofoam balls, portland and sand. I don't know the exact ratio of each. You will have to experiment a little to figure it out. Start with the styrofoam and add water and portland, then add the sand. You will want the mixture to have a consistency that will allow you to shape and form it. An additive called calcium chloride or concrete excellerator may be added to speed up the drying/curing time. (Don't add too much) If you don't want to try mixing your own you can purchase it already mixed (just add water) from other places on the internet.
As the project begins to dry you can shape it further with carving tools. Giving it more definition anything from a spoon to a mason trowel will work. The longer you let it dry the harder it will get. So try and get to it within 24 hours.
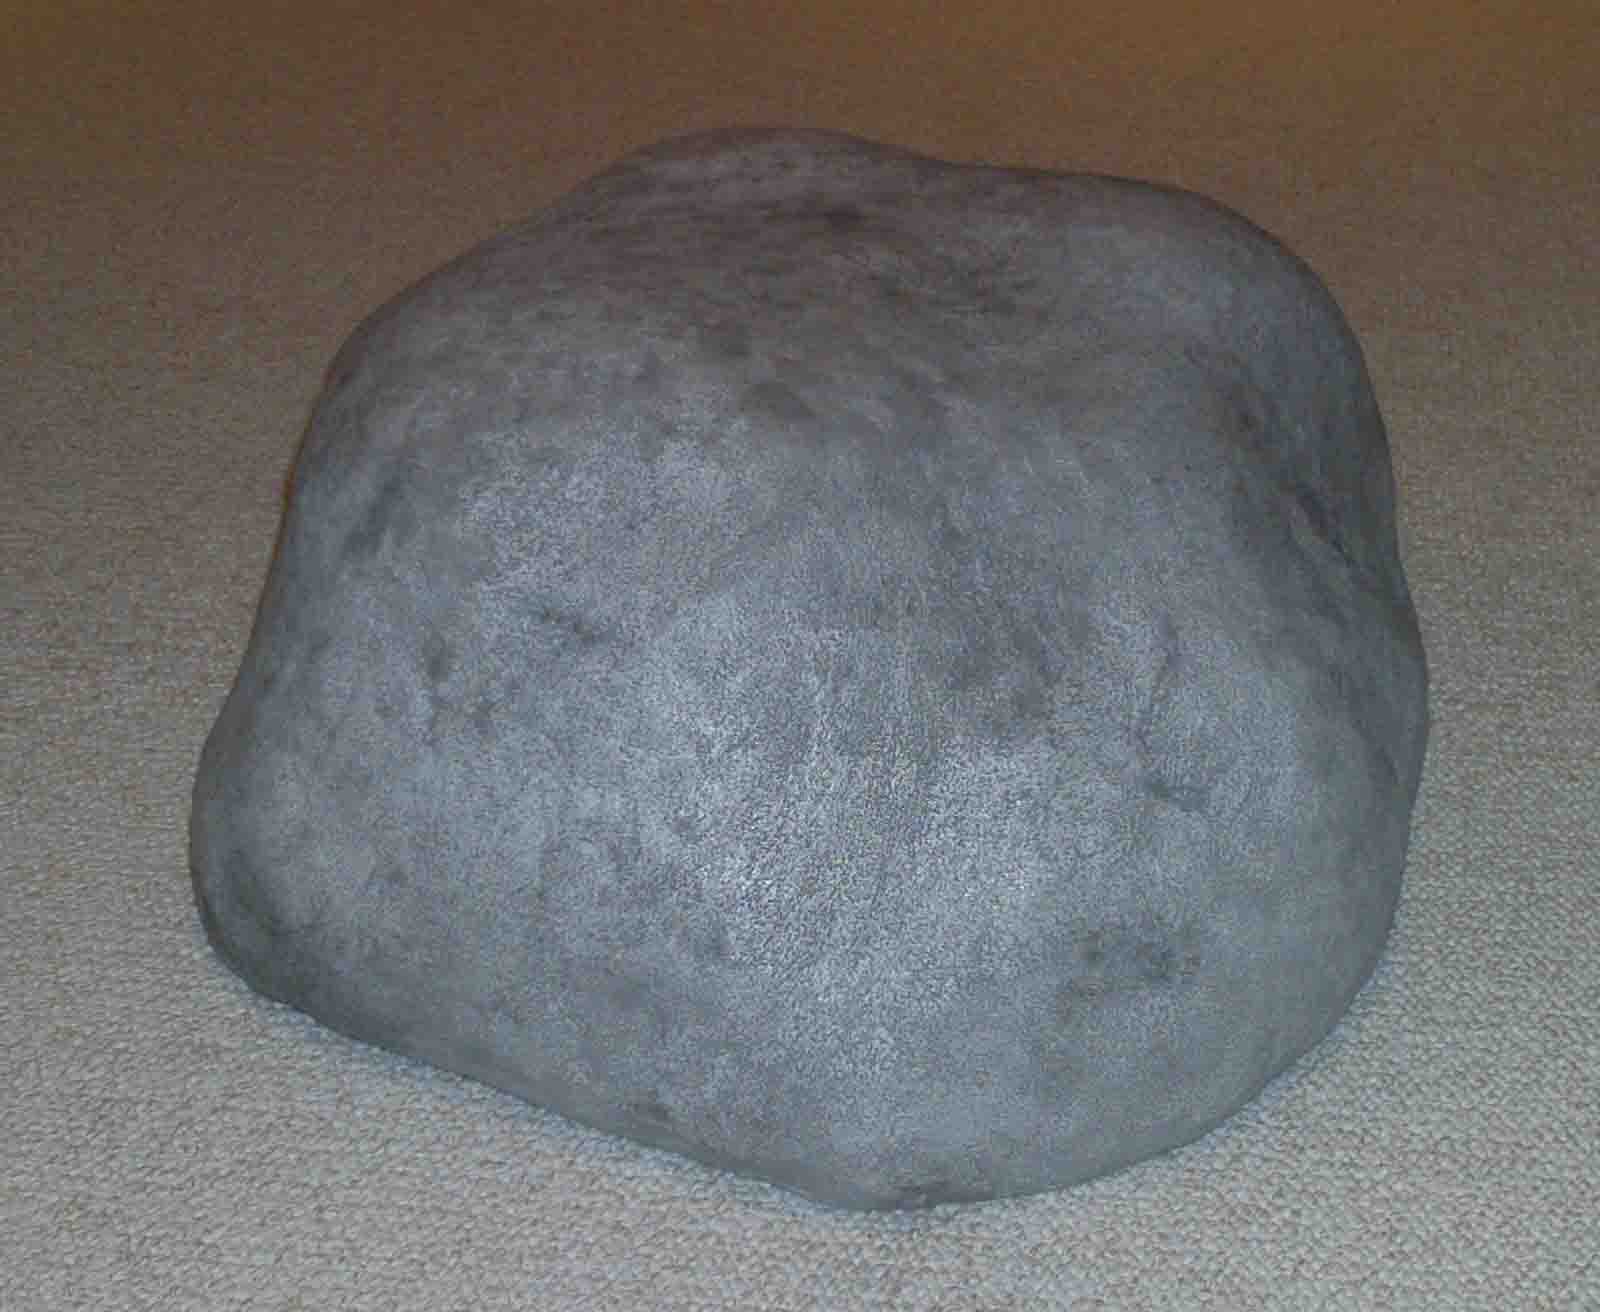
Once you have finished shaping your piece it is time to apply a thin layer of concrete. The concrete mix will be made from white portland, water and white silica sand 50-60 mesh seems to work the best. This mixture can also be bought in a bag (just add water) from concrete resurfacing suppliers. Make sure you use white portland if you plan on mixing your own. So it will stain afterwards. This mixture can be colored to create a solid color. For example if your rock is going to be dark in color you should mix the cement a couple of shades lighter than what you want your final piece to look like. Then when it is dry, you would have to add so much color stain to it. Once you have you color mixed, simple scoop up some in your hand (use rubber kitchen gloves) and rub all over your piece. The thickness all depends on you, you can leave just a thin layer to give it a smooth look or you can apply a thicker coat (1/4") then use a texture mat to give a different look. If you don't have a texture mat you can anything for a rag or garbage bag to give it a different look.
Staining or coloring can be done with concrete stains or using concrete acid stains. Both of these ways will take some practice in getting the look of a real rock. For example use a paintbrush to darken areas.
Use a concrete sealer to finish off the piece and to protect it from stains and the elements. Apply with a brush or spray it with an airless sprayer.
It is always a good idea to attend a seminar or class on how to make rocks before trying to make your own rocks. This way you will practice with their supplies and pick up on tricks of the trade.